
How to Install and Use 1STKIT Quick Deflate Valves
Last updated:
Check the valve height, let the tire down with the valve core removed, thread on the lock nut (optional), screw the valve on by hand and tighten it, then lock the nut against it. To air down, attach a gauge, twist the collar a little clockwise and lift it to let air out, push it down to close, and repeat until you reach your pressure.
Easy to Miss: Read This First
- Check the height first: the valve sits about 20 mm (0.8 inch) higher than stock, so on some tires it may stick out past the sidewall, which may be less safe on the road. The optional lock nut needs at least about 7 mm (0.28 inch) of outer thread on the valve stem.
- Fit the lock nut before the valve, not after.
- After removing the valve core, wait until the air stops before you screw on the valve, or the airflow can blow out the seal inside.
- Only ever twist the collar clockwise, a little, when opening or closing it. Never twist it counterclockwise: that can loosen the whole valve.
- Use a gauge with a screw-on chuck: it stays connected, so you can read the pressure as soon as you close the collar. Press-on and clip-on gauges also work, but take more steps: each round, push the collar down, attach the gauge, read it, remove it, then lift the collar again.
- To check the gauge less often, use the air release rates in the Air Release Time table below, or let air out for 10 seconds and work out your own rate. Then you know roughly how long to keep the collar open.
- On a TPMS valve stem, air release takes more than twice as long as on a standard one. See Air Release Time below for the times and how to tell which stem you have.
Before You Install: Check the Height and Thread
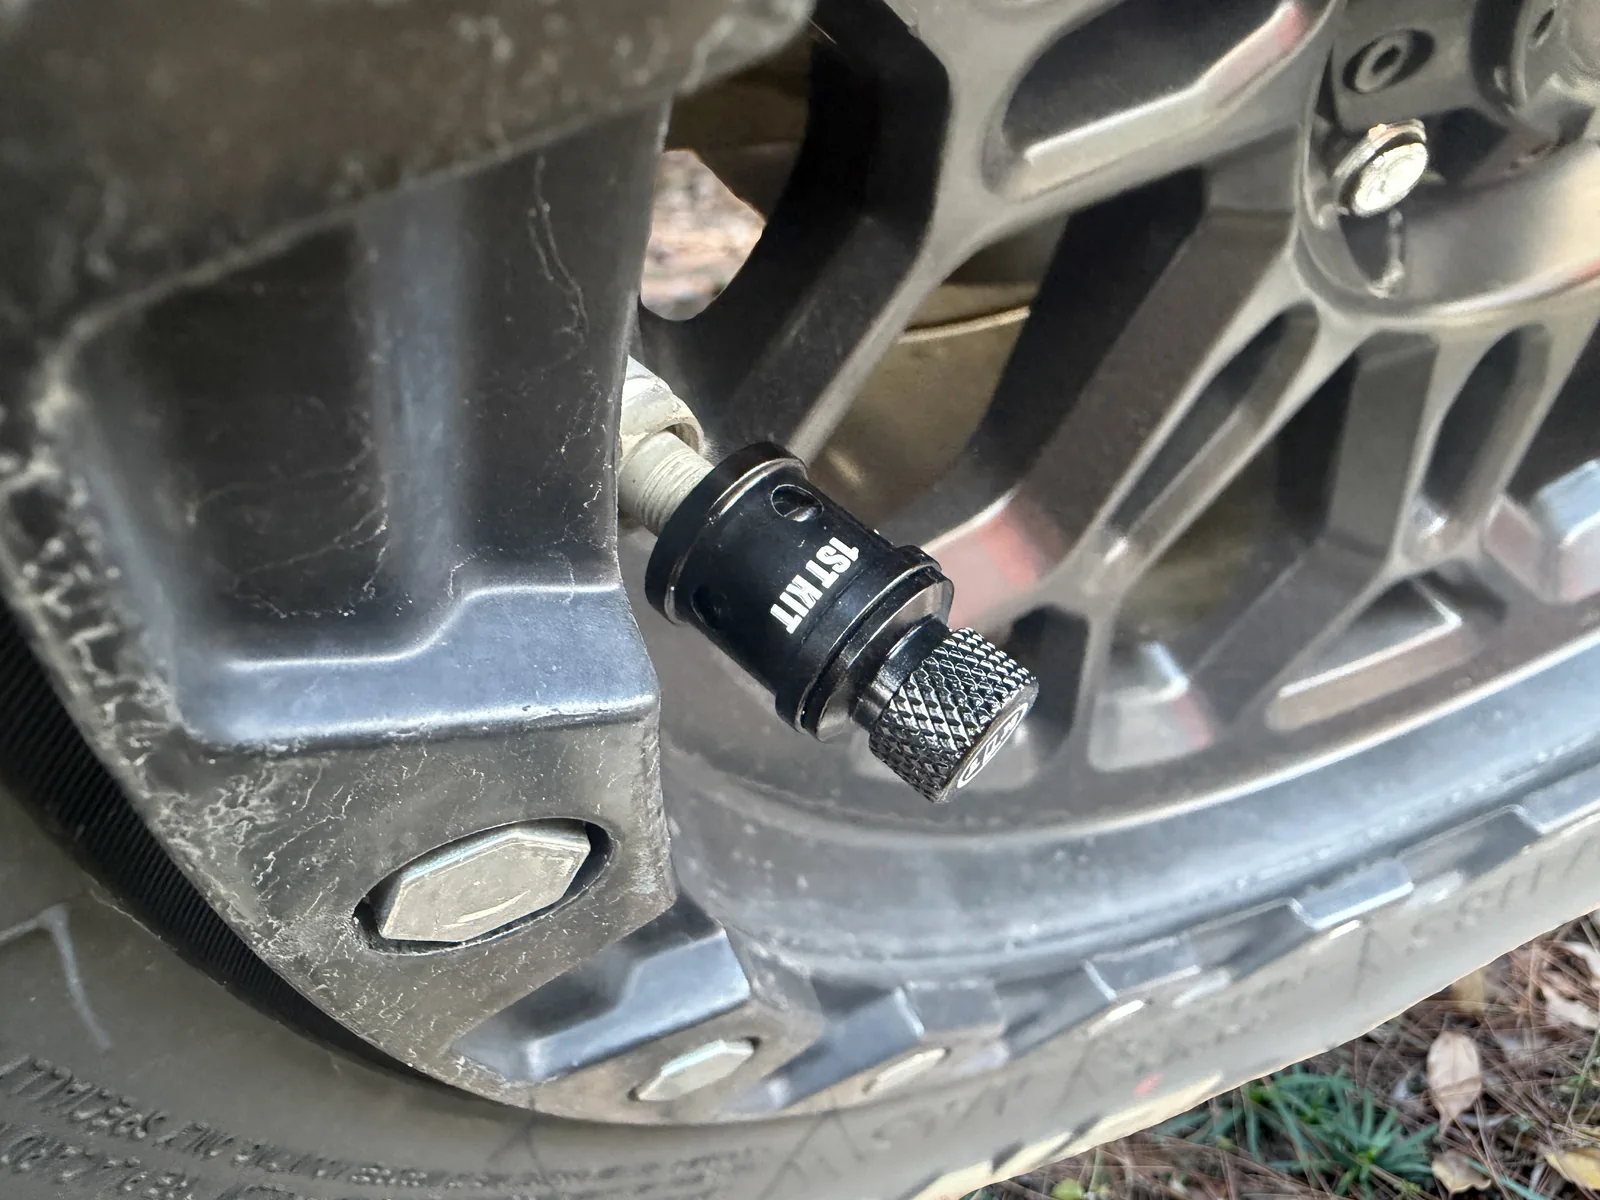
- Height: once installed, the valve sits about 20 mm (0.8 inch) higher than stock, about the height of two valve caps. Lay a straight board across the tire sidewall and stack two valve caps on the valve stem. If there is still a gap to the board, the valve will stay inside the sidewall (shown in the installation video below at 2:45). If it would stick out, that may be less safe on the road, so decide whether it suits your vehicle.
- Lock nut: look at the outer threads on your valve stem (their length, not the length of the whole stem). If they are shorter than about 7 mm (0.28 inch), there is no room for the lock nut, so you will install the valve without it.
How to Install
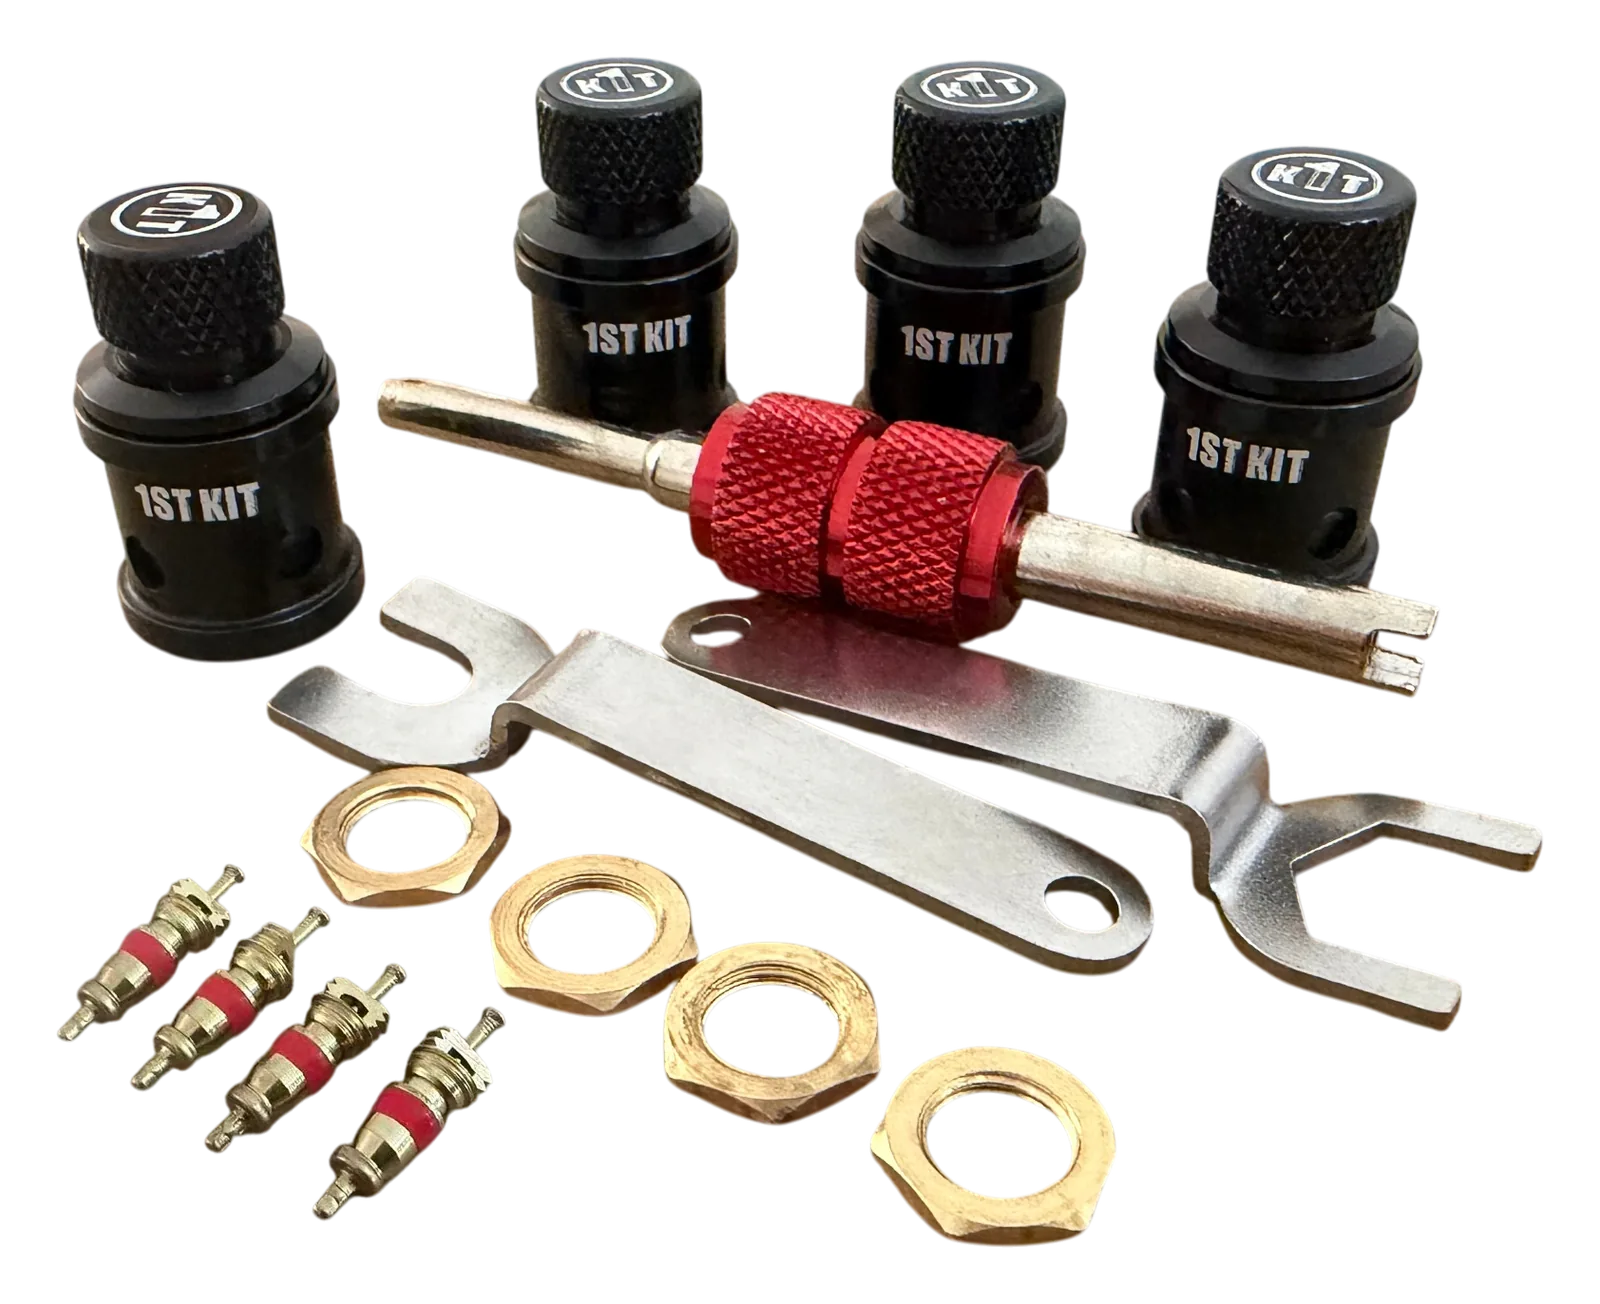
- Remove the valve cap. Use the valve core tool to take out the valve core and let the air out of the tire.
- Wait until you can no longer hear air escaping. Strong airflow can blow out the seal (O-ring) inside the valve.
- Thread the lock nut onto the valve stem and screw it all the way down. Skip this if the threads are too short.
- Take the cap off the Quick Deflate Valve and screw the valve onto the valve stem by hand, all the way down.
- Tighten the valve with one spanner to seal it. Then, with the second spanner, turn the lock nut the opposite way so it locks against the valve.
- Inflate the tire back to your normal pressure and put the cap back on.
How to Air Down
- Remove the cap from the Quick Deflate Valve and attach a tire gauge. A gauge with a screw-on chuck is best (chuck outer diameter under 12 mm, or 0.47 inch, so it does not block the collar), because it stays connected and you can read the pressure as soon as you close the collar. Press-on and clip-on gauges also work, but take more steps: each round, push the collar down, attach the gauge, read it, remove it, then lift the collar again.
- Twist the collar a little clockwise and lift it. Air rushes out. The seals grip the collar tightly, so pulling it straight up is hard, especially the first time; even a small clockwise turn frees it so it moves easily. Never twist it counterclockwise, as that can loosen the whole valve on the valve stem.
- Push the collar back down, twisting it a little clockwise as you push, to close it. Then check the gauge.
- Repeat until you reach your target pressure.
- Remove the gauge and put the cap back on.
Air Release Time
Air release time and rate from 40 to 20 PSI in our tests (air release only, not counting handling):
| Tire | Standard valve stem | TPMS valve stem |
|---|---|---|
| 32-inch | 17 s 1.2 PSI/s | 41 s 0.49 PSI/s |
| 35-inch | 25 s 0.8 PSI/s | 61 s 0.33 PSI/s |
Note: air does not come out at a steady rate. It flows faster while the tire pressure is high and slows down as the pressure drops. The rates here are averages (the 20 PSI released divided by the time), meant as a practical guide to roughly how long it takes to go from one pressure to another. Below 20 PSI it is a little slower, so start checking your gauge a bit early.
Estimated total time for all four tires from 40 to 20 PSI, including handling (valve caps, opening, closing and gauge checks):
| Tire | Standard valve stem | TPMS valve stem |
|---|---|---|
| 32-inch | 4-5 min | 6-7 min |
| 35-inch | 5-6 min | 7-8 min |
A TPMS valve stem has a smaller air inlet, so air release takes more than twice as long. Tip: use the table with a timer on your phone. For example, on a 32-inch tire with a standard stem, going from 36 to 12 PSI means letting out 24 PSI: 24 / 1.2 = about 20 seconds. Start checking the gauge at around 15 seconds.
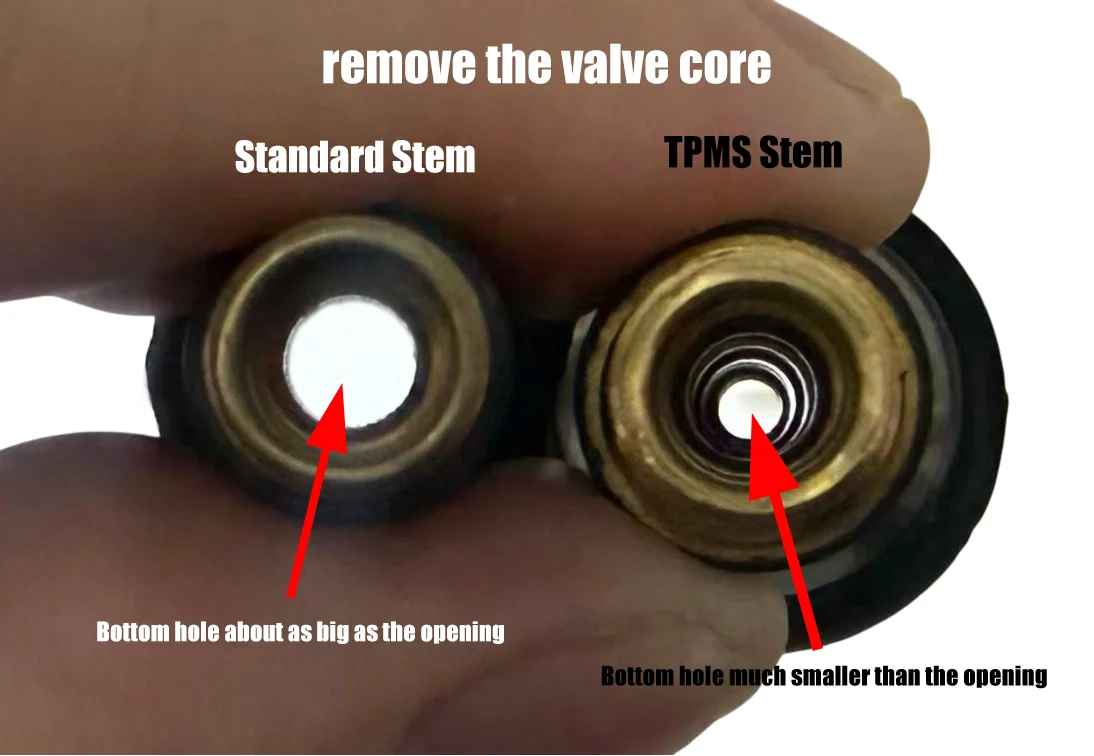
How to tell which valve stem you have: with the valve core out, look into the stem. If the hole at the bottom is much smaller than the opening at the top, it is almost always a TPMS valve stem. If the two are about the same size, it is almost always a standard valve stem. Either way, it is the size of that bottom hole that decides whether the air release slows down. So if someone with the same tool and the same tire size airs down much faster or slower than you, don't be surprised: one of you probably has TPMS valve stems. You can check while installing the valves, when the core is out anyway.
Tips
- Keep the caps on so dust stays out of the valve.
- The valve sits a little higher than stock, so take care on narrow trails with rocks close to the wheels.
- Reinflate to road pressure before driving on pavement or at speed.
Frequently Asked Questions
Do I have to fit the lock nut?
It is optional. The valve works normally without it, but fitting it is better if you have room: it locks the valve against the valve stem so it cannot work loose, and makes the valve harder to steal. Some valve stems have outer threads shorter than about 7 mm (0.28 inch), which leaves no room for the nut. Without the nut, just never twist the collar counterclockwise, as that could loosen the valve.
Will the valve stick out past my tire?
It sits about 20 mm (0.8 inch) higher than a stock valve, about the height of two valve caps. Lay a straight board across the tire sidewall and stack two caps on the valve stem: if there is still a gap to the board, it will stay inside the sidewall. If it would stick out, it can still be used, but it may be less safe on the road, so it is your call.
How fast does it let air out?
About 1.2 PSI per second on a 32-inch tire with a standard valve stem, so about 17 seconds from 40 to 20 PSI, and about 0.8 PSI per second on a 35-inch tire. On TPMS valve stems it takes more than twice as long.
How do I tell if I have a TPMS valve stem?
Remove the valve core and look into the stem. If the hole at the bottom is much smaller than the opening at the top, it is almost always a TPMS valve stem. If the two are about the same size, it is almost always a standard valve stem. You can check while installing the valves, when the core is out anyway.
How can I air down more efficiently?
Use a timer instead of stopping to check over and over. If you know your setup, use our air release rates: on a 32-inch tire with a standard valve stem it is about 1.2 PSI per second, so going from 36 to 12 PSI (24 PSI) takes about 20 seconds; open the valve and start checking at around 15 seconds. If you are not sure whether you have a TPMS valve stem, measure it: open the valve for exactly 10 seconds and check the gauge. For example, if it dropped from 36 to 30 PSI, that is 6 PSI in 10 seconds, or 0.6 PSI per second. To reach 18 PSI you need 12 PSI more, about 20 seconds, so open it again for about 15 seconds, check, and finish with short bursts.
Can I use a press-on or clip-on tire gauge?
Yes, but it takes more steps: each time you push the collar down, you have to press the gauge onto the valve to take a reading. Almost all clip-on (lever) chucks have a head that is too big to stay connected while you open the collar, so use them the same way: push the collar down first, then clip on and read. A gauge with a screw-on (threaded) chuck, like the one in our video, with a chuck outer diameter under 12 mm (0.47 inch) so it does not block the collar, stays connected, so you can read the pressure as soon as you push the collar down.
Why do I have to wait before installing it?
With the valve core out, the air rushes out of the stem. Installing the valve while air is still blowing out can push out the seal inside the valve. Wait until you cannot hear air escaping.